Forge配置Mixins 方法1.使用Minecraft Development 插件 创建项目时候勾选上Use Mixins即可。
点击create后等待构建完成。
这里我使用这个插件构建项目导致启动游戏会报错找不到main类,不怎么怎么解决。
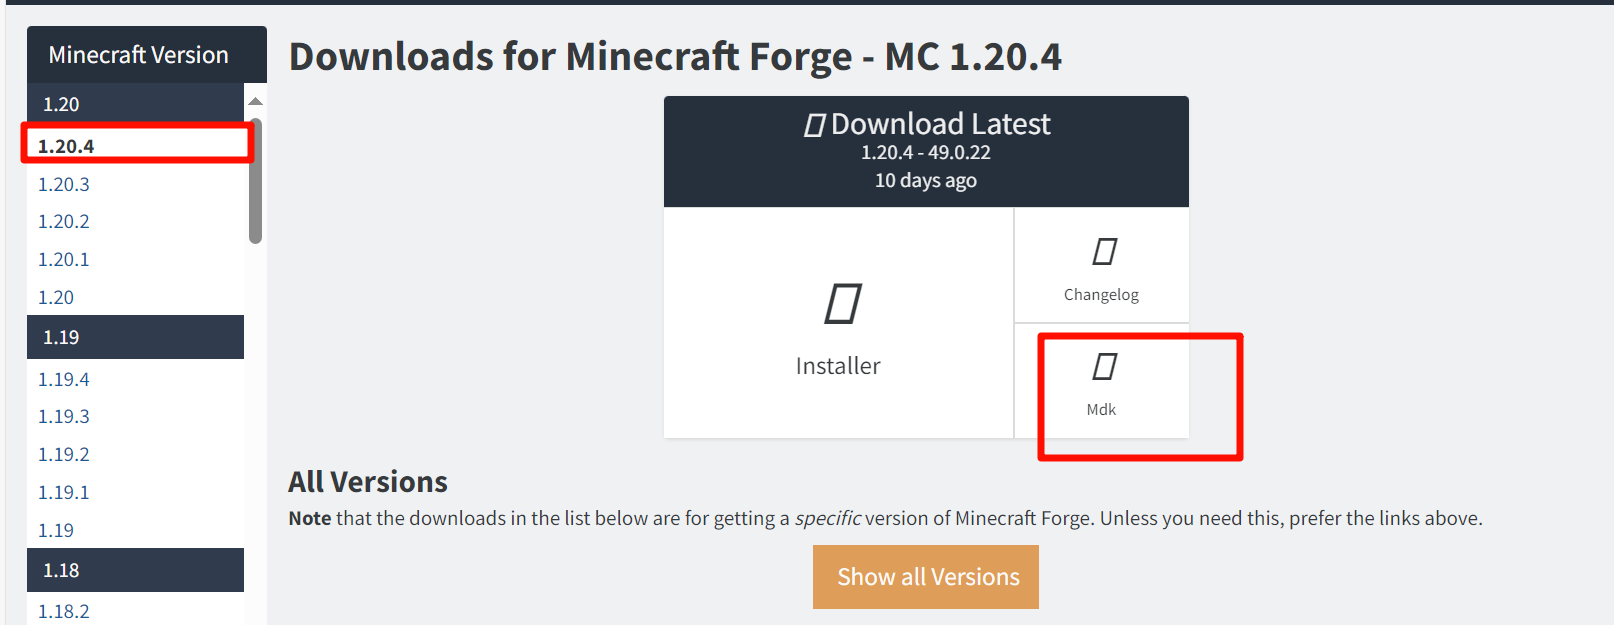
方法2 在Forge开发环境中配置Mixins 配置forge 下载Forge的MDK
等待广告后下载
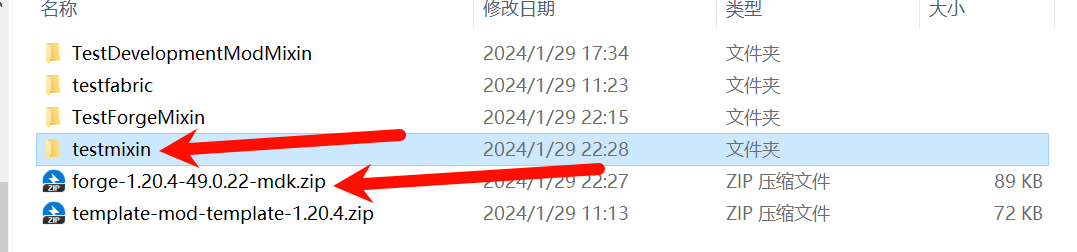
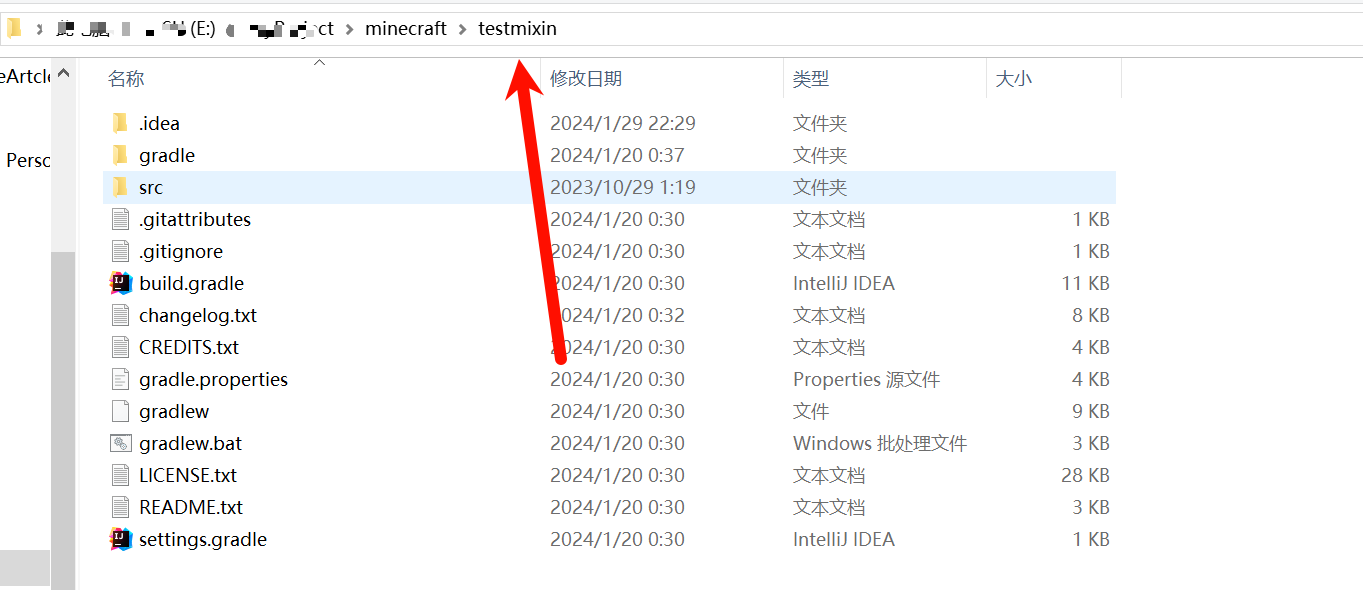
解压后使用IDEA打开这个文件夹
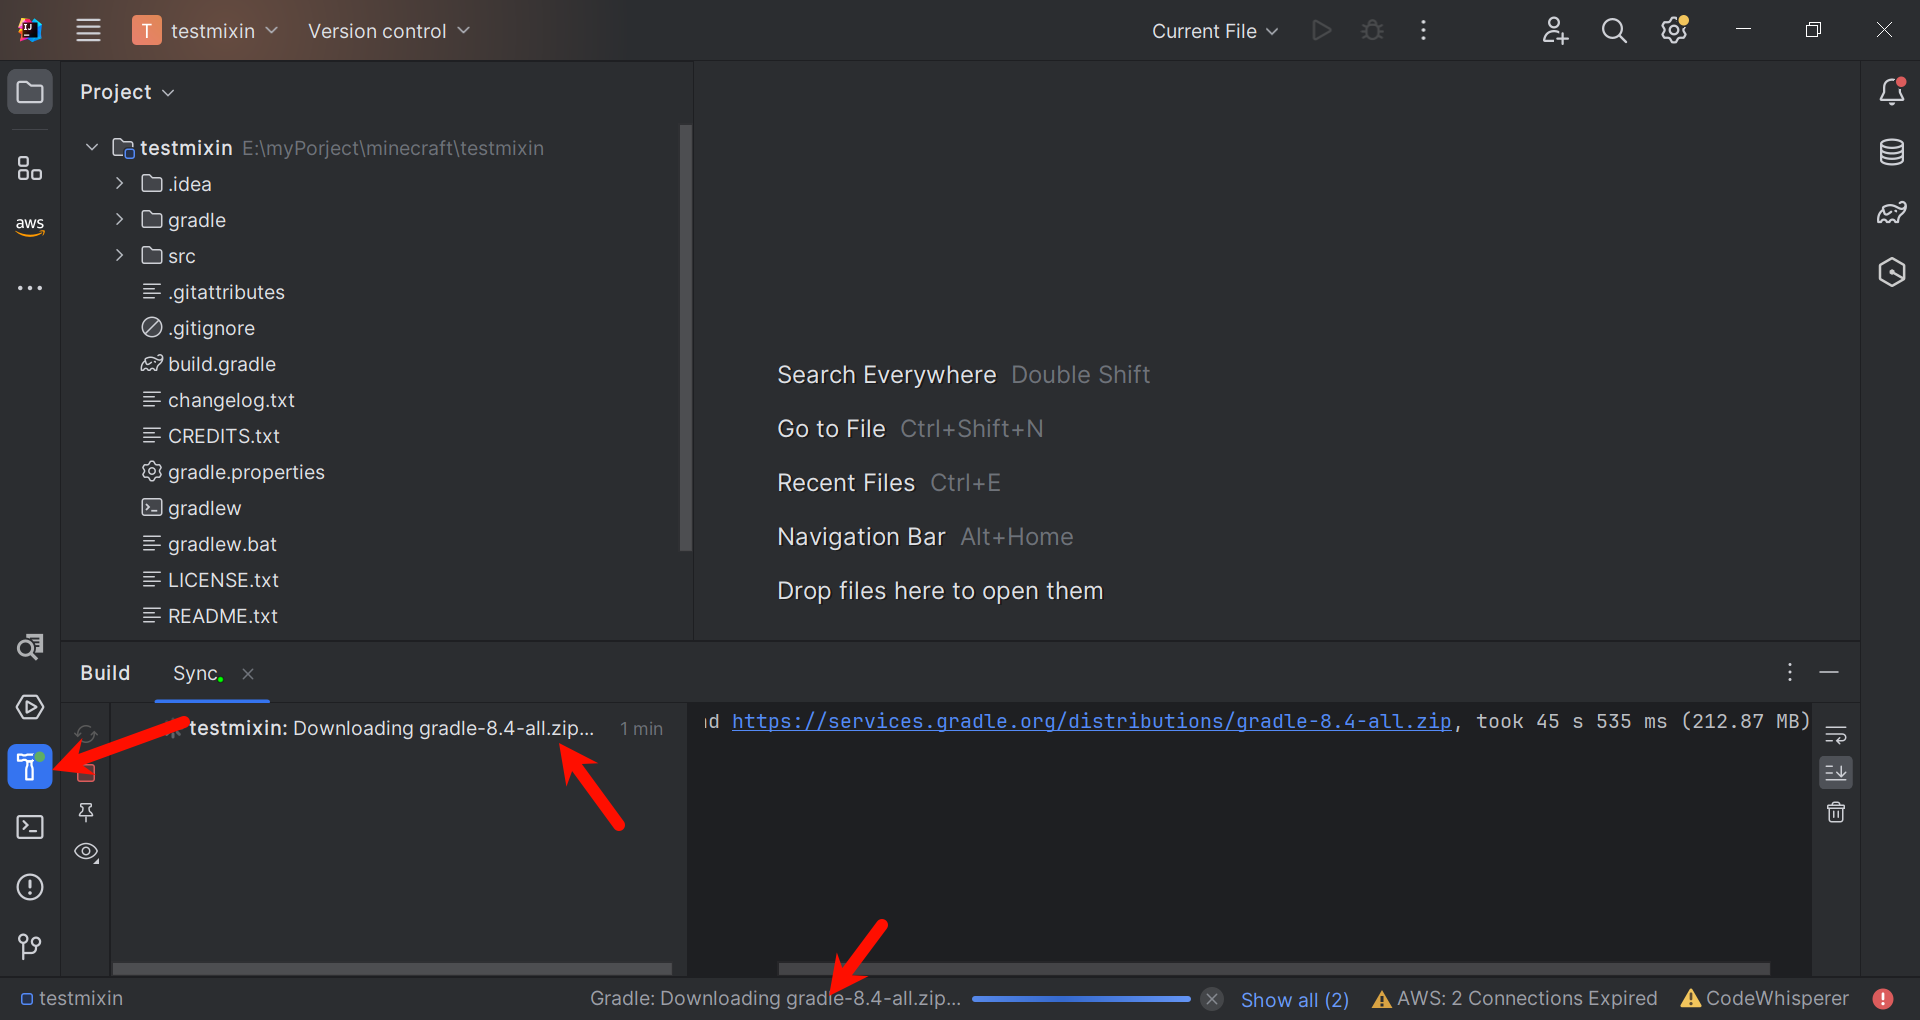
等待项目构建完成
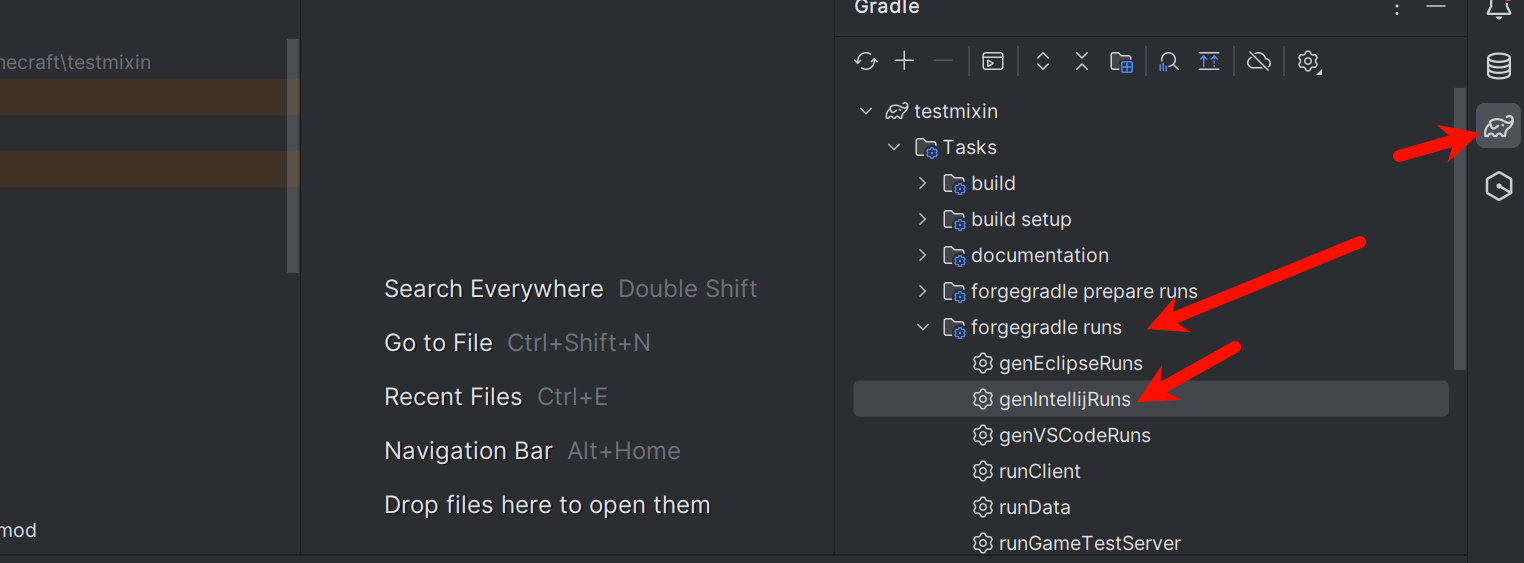
运行该Task
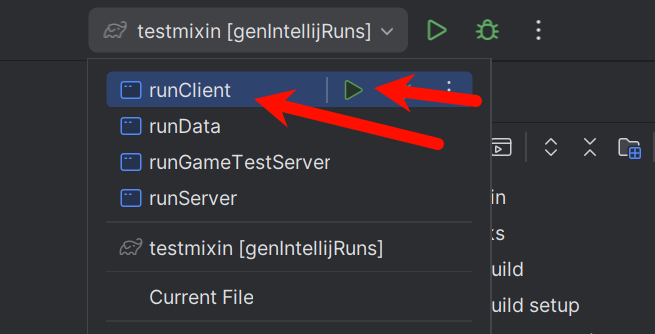
完成后可以选择run client
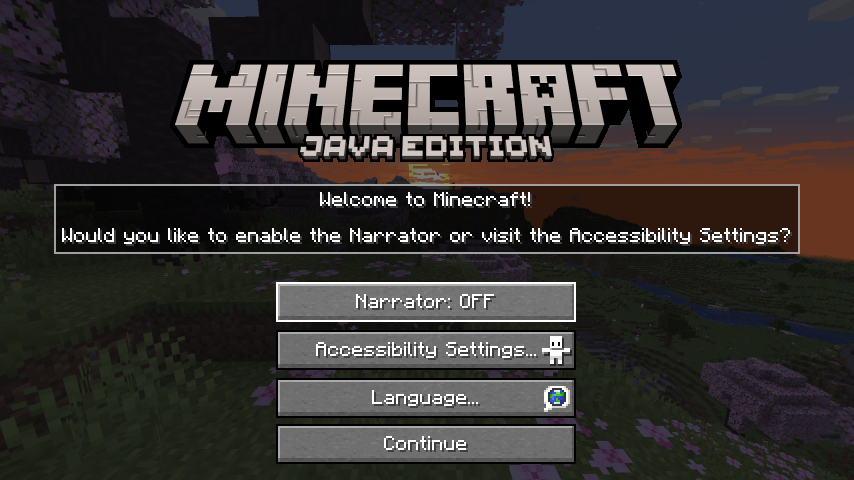
正常启动,就说明forge可以正常运行了。
配置mixin 1.将MixinGradle插件添加到Gradle构建脚本中
1
2
3
4
5
6
7
8
9
10
11
12
13
14
15
16
buildscript { repositories { maven { url = 'https://repo.spongepowered.org/repository/maven-public/' } mavenCentral() jcenter() } dependencies { classpath 'org.spongepowered:mixingradle:0.7-SNAPSHOT' } } apply plugin: 'org.spongepowered.mixin'
2.配置一个refmap的生成,使用它来映射到不同的Minecraft环境。
1
2
3
4
5
6
7
8
9
mixin { add sourceSets.main, "${mod_id}.refmap.json" config "${mod_id}.mixins.json" debug.export = true }
3.添加一个Mixin作为注释处理器
1
2
3
4
dependencies { annotationProcessor 'org.spongepowered:mixin:0.8.5:processor' }
4.添加一个Mixin配置文件
modid.mixins.json
1
2
3
4
5
6
7
8
9
10
11
12
13
14
15
16
17
{ "required" : true , "minVersion" : "0.8" , "package" : "com.example.examplemod.mixin" , "compatibilityLevel" : "JAVA_17" , "refmap" : "examplemod.refmap.json" , "mixins" : [ "ExampleMixin" , "LivingEntityMixin" ] , "client" : [ ] , "injectors" : { "defaultRequire" : 1 } }
5.最后,您必须使用 genIntellijRuns 或 genEcliipseRuns 重新生成运行配置,具体取决于您的IDE,以允许MixinGradle配置它们
测试Mixin
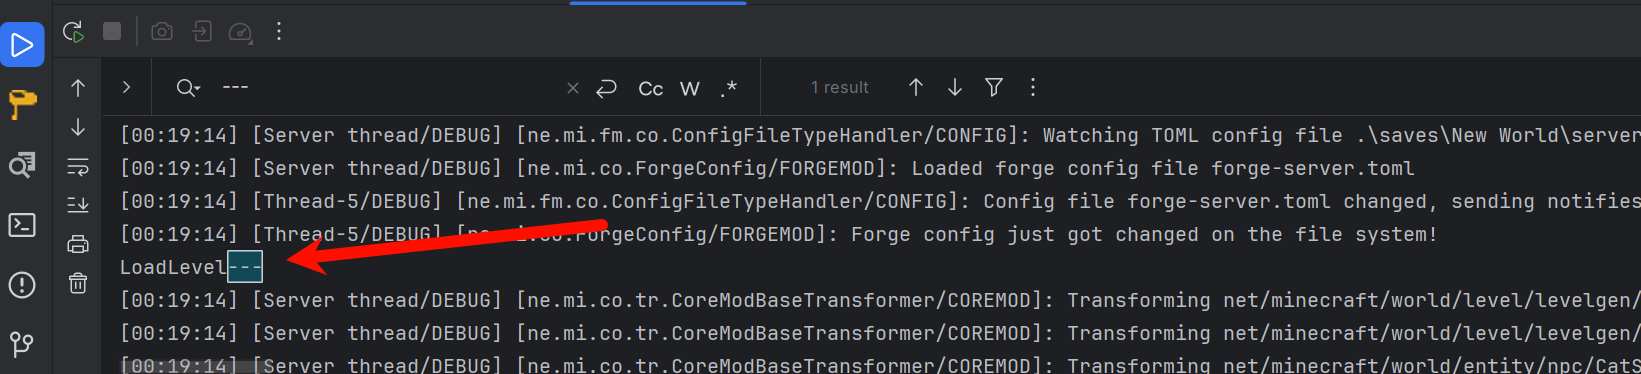
1
2
3
4
5
6
7
8
9
10
11
12
13
14
15
16
package com.example.examplemod.mixin;import net.minecraft.server.MinecraftServer;import org.spongepowered.asm.mixin.Mixin;import org.spongepowered.asm.mixin.injection.At;import org.spongepowered.asm.mixin.injection.Inject;import org.spongepowered.asm.mixin.injection.callback.CallbackInfo;@Mixin(MinecraftServer.class) public class ExampleMixin { @Inject(at = @At("HEAD"),method = "loadLevel") private void init (CallbackInfo info) { System.out.println("LoadLevel---" ); } }
添加ExampleMinxin类到mixins的json文件中
1
2
3
4
5
6
7
8
9
10
11
12
13
14
15
16
17
{ "required" : true , "minVersion" : "0.8" , "package" : "com.example.examplemod.mixin" , "compatibilityLevel" : "JAVA_17" , "refmap" : "examplemod.refmap.json" , "mixins" : [ "ExampleMixin" , "LivingEntityMixin" ], "client" : [ ], "injectors" : { "defaultRequire" : 1 } }
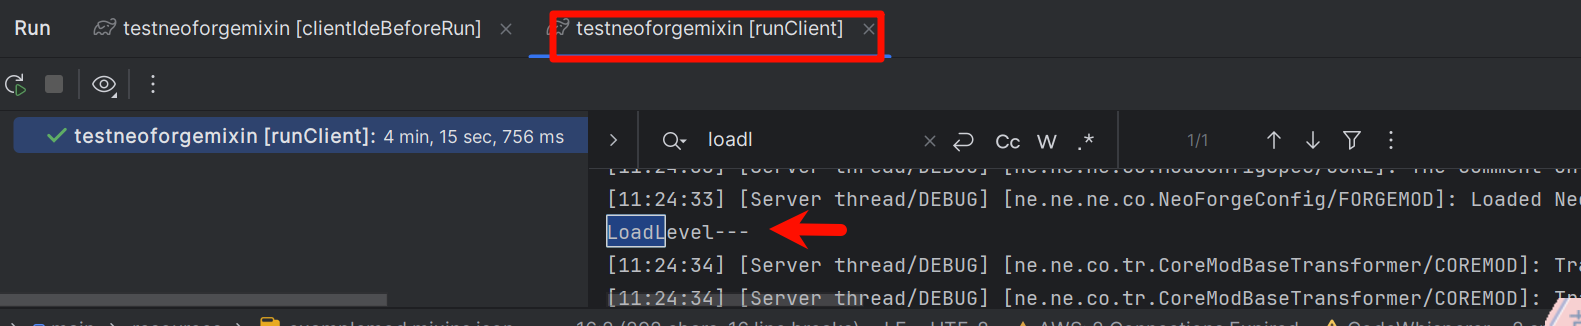
启动游戏进入世界会打印LoadLevel的内容
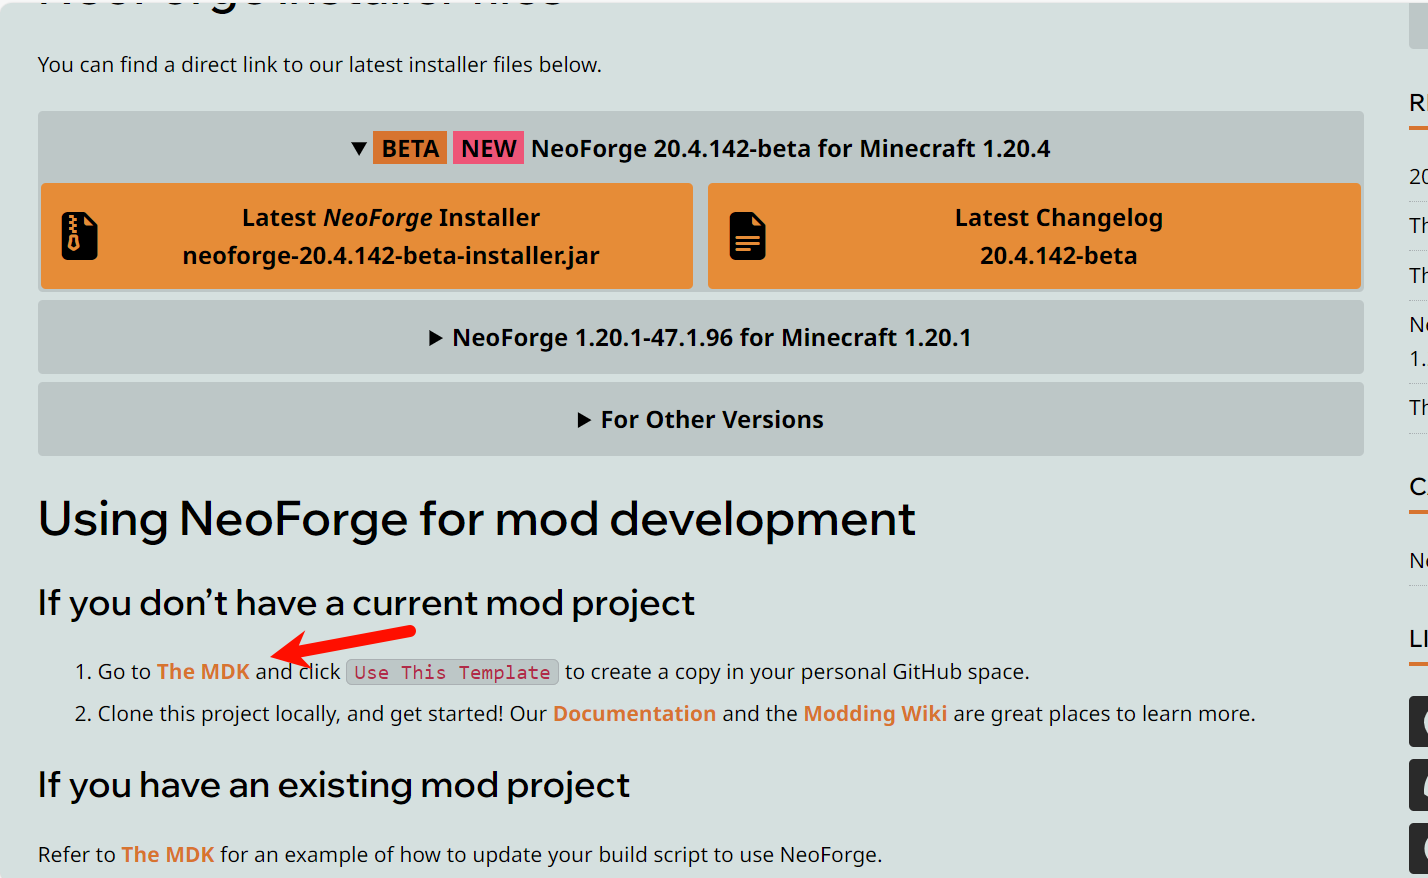
NeoForge配置Mixins 配置Neoforge开发环境 1.进入官网点击MDK
2.点击code,下载zip
解压压缩包,我这里还换了个文件夹的名称
用Idea打开文件夹。等待build完成。
构建完成
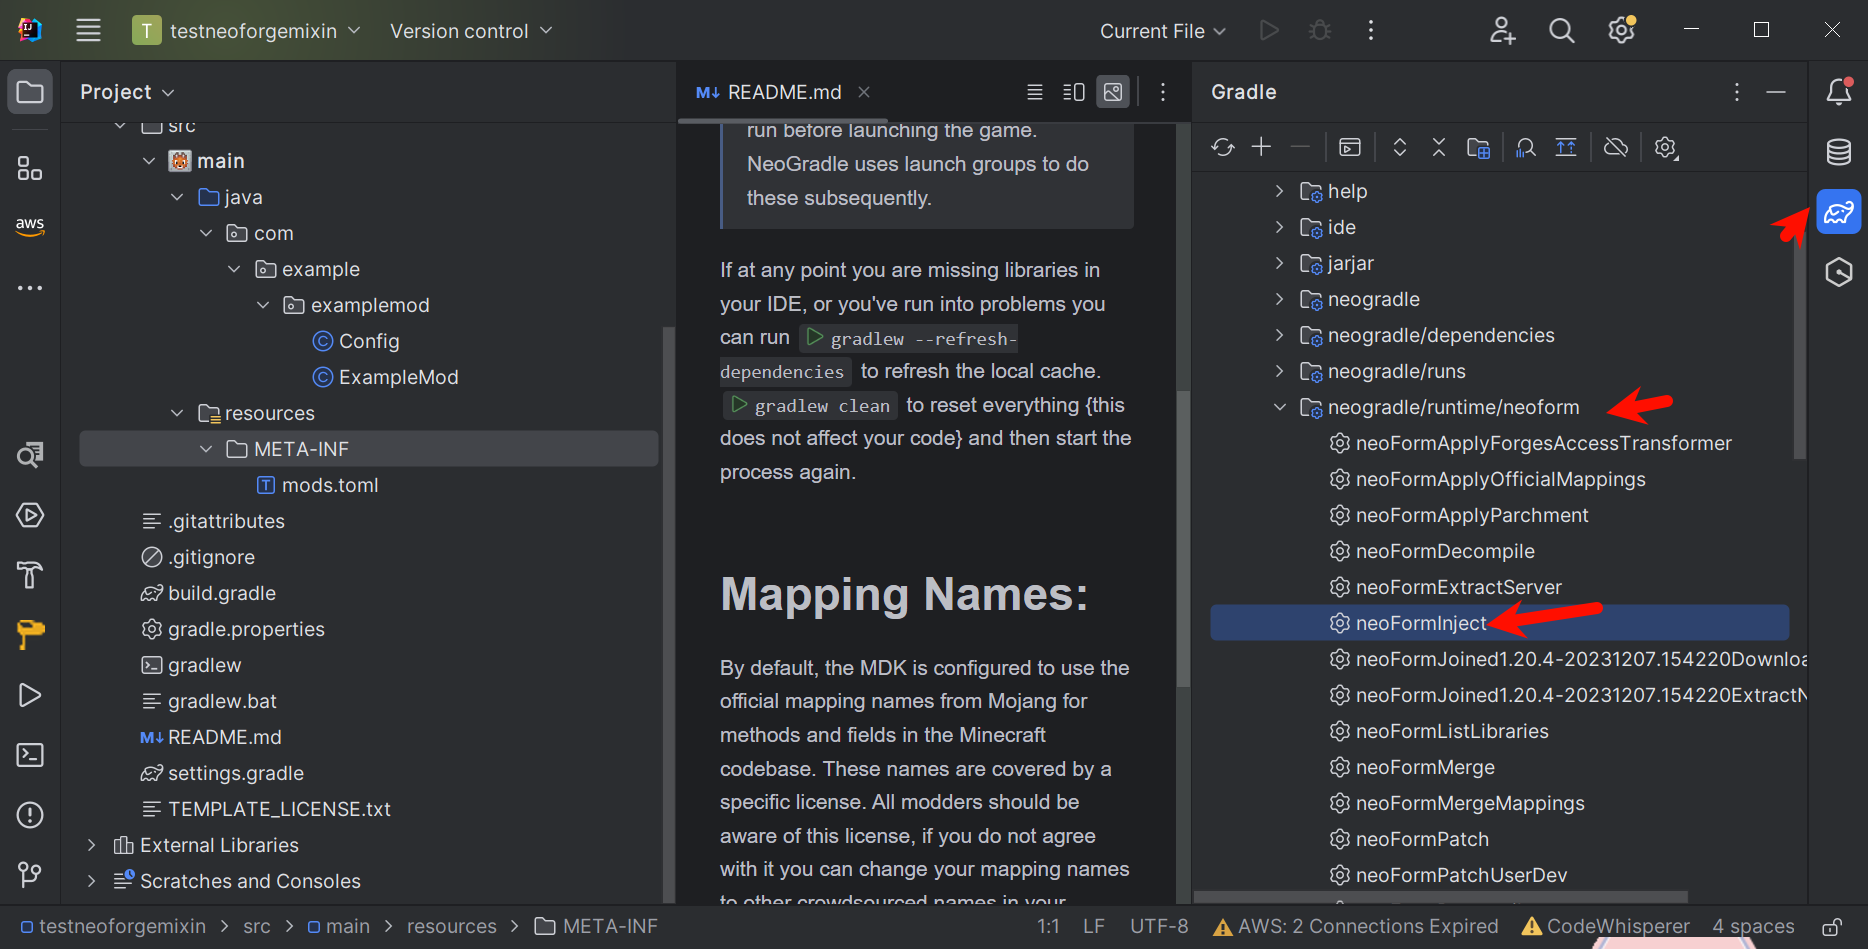
运行此task获得idea的配置
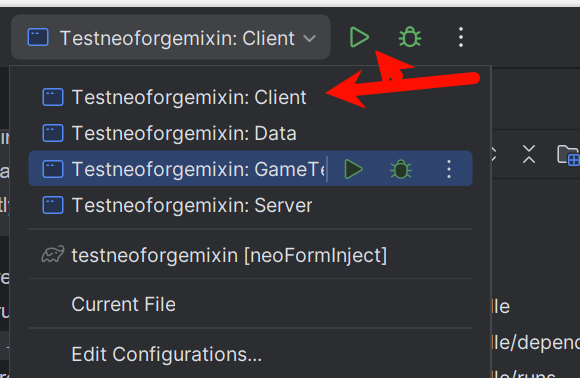
选中run client 启动
正常启动游戏
配置mixin 在build.gradle中配置以下的内容
1
2
3
4
5
6
7
8
9
10
11
12
13
14
15
16
plugins { id 'java-library' id 'eclipse' id 'idea' id 'maven-publish' id 'net.neoforged.gradle.userdev' version '7.0.80' id 'net.neoforged.gradle.mixin' version '7.0.80' } mixin { config("${mod_id}.mixins.json" ) }
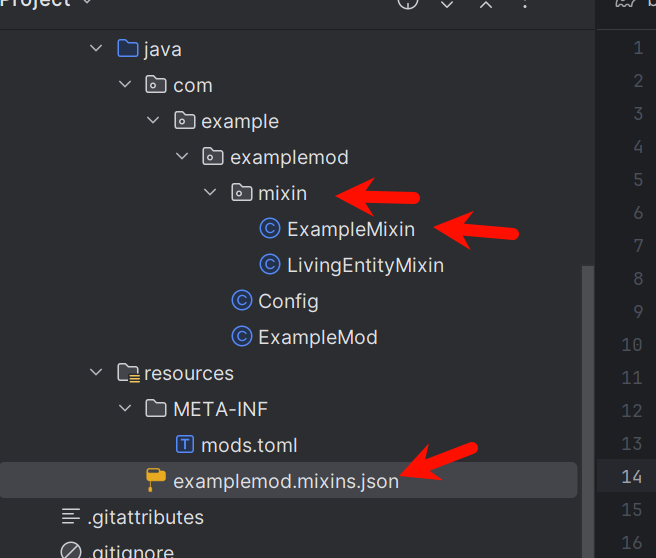
2.添加mixins的json文件
ExampleMixin
1
2
3
4
5
6
7
8
9
10
11
12
13
14
15
package com.example.examplemod.mixin;import net.minecraft.server.MinecraftServer;import org.spongepowered.asm.mixin.Mixin;import org.spongepowered.asm.mixin.injection.At;import org.spongepowered.asm.mixin.injection.Inject;import org.spongepowered.asm.mixin.injection.callback.CallbackInfo;@Mixin(MinecraftServer.class) public class ExampleMixin { @Inject(at = @At("HEAD"),method = "loadLevel") private void init (CallbackInfo info) { System.out.println("LoadLevel---" ); } }
examplemod.mixins.json
1
2
3
4
5
6
7
8
9
10
11
12
13
14
15
16
{ "required" : true , "minVersion" : "0.8" , "package" : "com.example.examplemod.mixin" , "compatibilityLevel" : "JAVA_17" , "refmap" : "examplemod.refmap.json" , "mixins" : [ "ExampleMixin" , "LivingEntityMixin" ] , "client" : [ ] , "injectors" : { "defaultRequire" : 1 } }
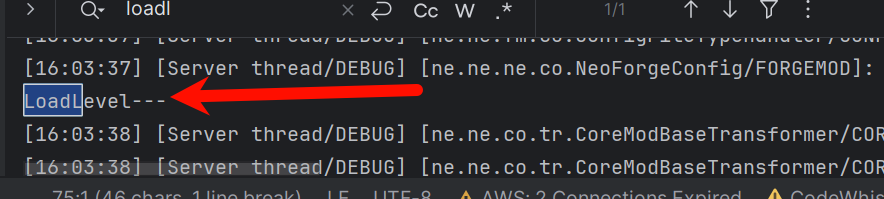
启动游戏测试 创建一个世界,进入游戏看查看到mixin成功运行了。
Neoforge默认已经支持mixin,直接在toml中配置下json文件即可使用 mods.toml
1
2
[[mixins]] config ="examplemod.mixins.json"
examplemod.mixins.json
1
2
3
4
5
6
7
8
9
10
11
12
13
14
15
{ "required" : true , "minVersion" : "0.8" , "package" : "net.flandre923.examplemod.mixin" , "compatibilityLevel" : "JAVA_17" , "refmap" : "examplemod.refmap.json" , "mixins" : [ "ExampleMixin" ] , "client" : [ ] , "injectors" : { "defaultRequire" : 1 } }
添加一个测试用的类
1
2
3
4
5
6
7
8
9
10
11
12
13
14
15
package net.flandre923.examplemod.mixin;import net.minecraft.server.MinecraftServer;import org.spongepowered.asm.mixin.Mixin;import org.spongepowered.asm.mixin.injection.At;import org.spongepowered.asm.mixin.injection.Inject;import org.spongepowered.asm.mixin.injection.callback.CallbackInfo;@Mixin(MinecraftServer.class) public class ExampleMixin { @Inject(at = @At("HEAD"),method = "loadLevel") private void init (CallbackInfo info) { System.out.println("LoadLevel---" ); } }
启动测试
参考 Dark的网站|Mixin简介- Forge — Dark’s Site | Mixin Introduction - Forge (darkhax.net)
[build.gradle - BetterCompatibilityChecker GitHub] - Visual Studio Code - GitHub